Overview #
This chapter will describe how to create and run your first project. Users must set up the TM robot properly according to the hardware manual.
Set up TMflow software #
Step #1: Follow the steps to set up the robot.
Step #2: Select the interface language.
Step #3: Set the system time.
Step #4: Set the Network settings.
Step #5: Perform voice settings.
Navigate to ![]() (on the upper left corner of the HMI), and click Setting -> Wizard to reset if required.
(on the upper left corner of the HMI), and click Setting -> Wizard to reset if required.
Create a simple TMflow project #
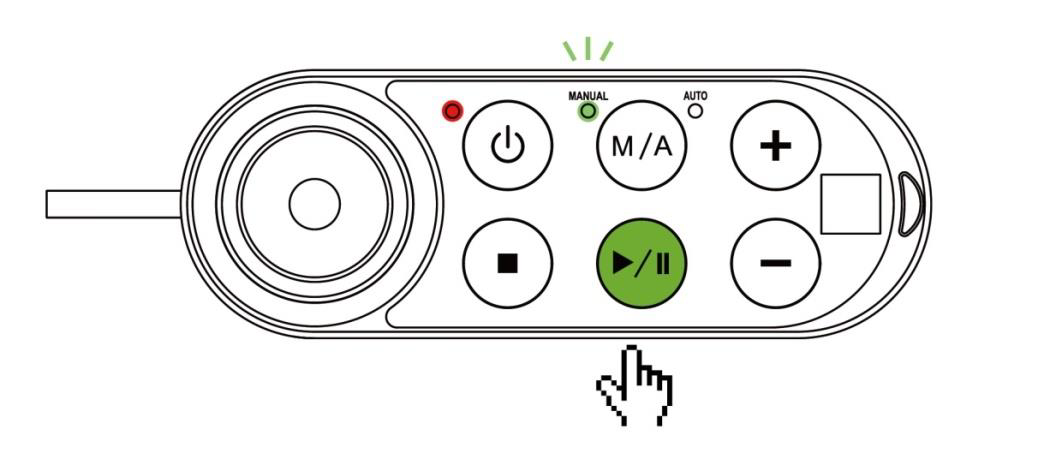
Step #1: Confirm the Operation Mode of the robot. If it is not in Manual Mode, press M/A Mode Button to switch to Manual Mode (green indicator light).
Step #2: Navigate to ![]() , and click Project to enter the Project Editing Page.
, and click Project to enter the Project Editing Page.
Step #3: Choose to create a new project and enter the project name.
Step #4: Enter the project name. The maximum number of characters for naming a project is 100.
Step #5: Press the FREE Button to move the robot to any point by hand guiding

Step #6: Press the POINT Button to let the project flow generate the point. You can see that the robot automatically names this point as P1 and has been automatically added after the Start Node and automatically highlighted.

Step #7: Press the save icon (![]() ) to complete the project editing.
) to complete the project editing.
Step #8: Press the Play/Pause Button on the Robot Stick in the Project Editing Page to start running the project. At the same time, the Indication Light Ring will flash in green. Each time you start running a project in Manual Mode, the Robot Stick looks as shown.